Finding and Enabling Microsoft Defender for (Windows) PC
Overview
Microsoft Defender is a component of Windows 10 and 11 that provides comprehensive, built-in and ongoing security protections. It features an anti-virus, anti-malware, firewall and more, to keep your personal computer safe. Please follow the below instructions to find and enable Microsoft Defender on your (Windows) PC.
NOTE: Microsoft Defender cannot be enabled when another anti-virus is installed, e.g.: Trend Micro Antivirus
Instructions
To enable Windows Defender
|
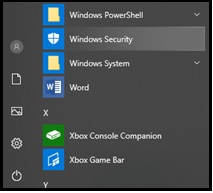
1. Click the windows logo in the bottom left corner of the screen/task bar (Windows 10) or at the middle left of the bottom task bar (Windows 11).

or

The Start menu will pop up.
|
| 2. Scroll down and click Windows Security to open the application (Windows 10).
-OR-
Click on 'All Apps"

Then scroll down to and click on Windows Security (Windows 11):

|
|
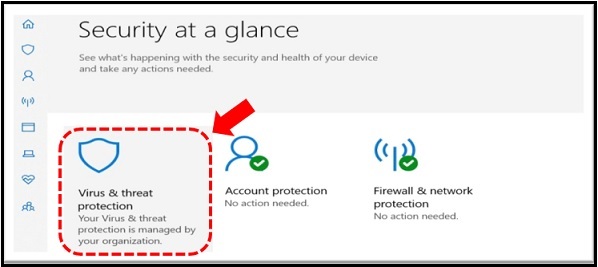
| 3. On the Windows Security screen, check if any antivirus program has been installed and running in your computer. |
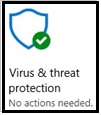 |
Green tick: An antivirus program is present and running in your computer. Enabling of Windows Defender is not necessary as your computer is protected by Windows Defender. |
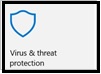 |
No tick: No antivirus present and Windows Defender is not enabled in your computer. Please proceed to next step to enable Windows Defender, to keep your personal computer safe.
|
| |
|
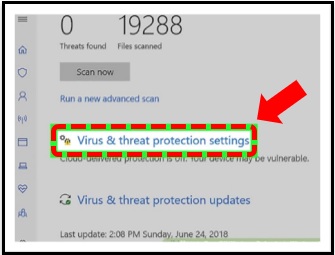
| 4. Click on Virus & threat protection as shown
|
| 5. Next, select Virus & threat protection icon
|
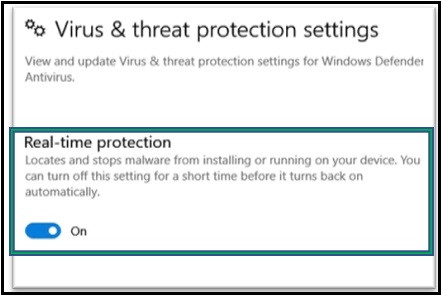
| 6. Turn on for Real-time protection
|
For additional help, please contact the IT Support Services at (412) 365-1112 or submit a ticket at services.chatham.edu